When you use Visual Studio Code, you almost certainly use extensions. If you are developing in various languages, the extensions you want to use will differ depending on the language. The extensions you have installed are stored in the following location on Windows.
%USERPROFILE%\.vscode\extensions
Example. C:\Users\marock\.vscode\extensions
In this article, I will show you how to change the extensions by development language by changing the folder where the installed extensions are stored.
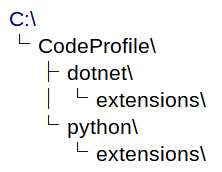
To change the folder of the referenced extension, specify the command line option (extensions-dir). As a preliminary step, create an extension storage folder for each language (the unit you want to switch extensions). I have created them as follows.
To develop dotnet, start Visual Studio Code with the following command.
code --extensions-dir C:\CodeProfile\dotnet\extensions
To develop python, start Visual Studio Code with the following command.
code --extensions-dir C:\CodeProfile\python\extensions
In this method, only the folder of the extension is changed, so settings.json and other configuration information will be the same. If you want to separate the settings information as well, specify the command line option (user-data-dir) separately.
code --extensions-dir C:\CodeProfile\dotnet\extensions --user-data-dir C:\CodeProfile\dotnet
Since it is cumbersome to start the program from the command line every time, we recommend that you create a shortcut.

コメント